Virtual Samples are an effective way to showcase the end buyer's logo on a product without having to order a physical sample. By uploading a logo to display on all virtual sample enabled products, you can help your customer visualize the final product.
You are able to add or remove a virtual sample image from all products in the Preferences section of ESP Web.
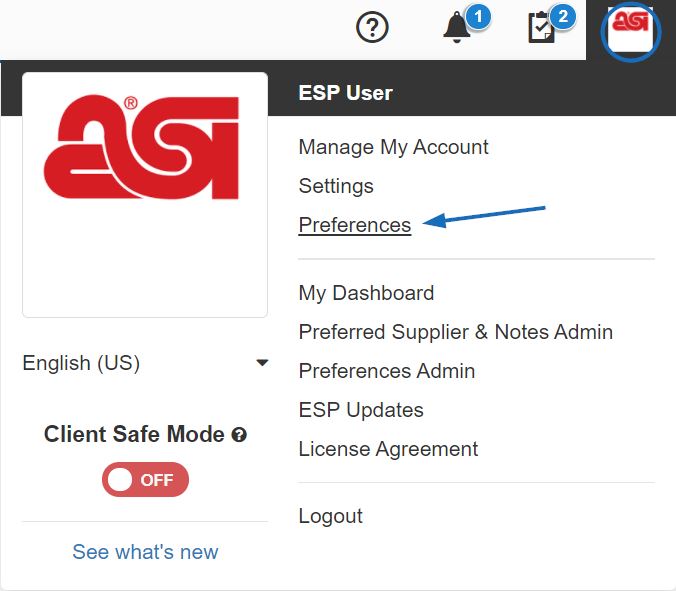
To access your Preferences:
- Step 1: Click on your user profile icon and select Preferences from the menu.

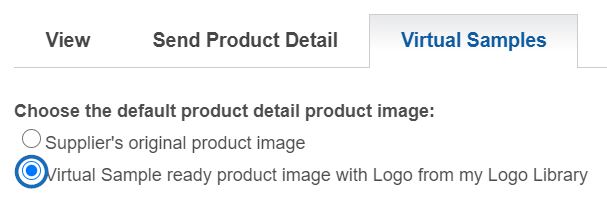
- Step 2: In the Preferences window, click on the Virtual Samples tab within Preferences.

Once you are in the Virtual Samples tab, you can either upload an image to display on all virtual sample enabled products or remove a previously applied one. If you would more information on how to create an individual virtual sample, please review the Virtual Samples in ESP Web article.
What would you like to do?
Upload and Apply a Logo to All Products
To upload the logo you would like to apply to all virtual sample enabled products in ESP Web, click on the "Virtual Sample ready product image with Logo from my Logo Library" option.

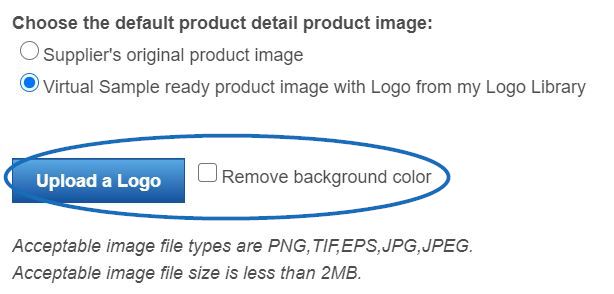
If your image contains a solid background color, check the box before uploading your image. Next, click on the Upload a Logo button. Then, browse your computer, locate the image you would like to use, select it, and click on Open.

A preview of the logo will display. When you are finished, click on the Save button at the bottom of the window.
All virtual sample enabled images will now be displayed with the logo you have uploaded.
Note: You may need to refresh your page to see these changes.
Remove a Virtual Sample Image from All Products
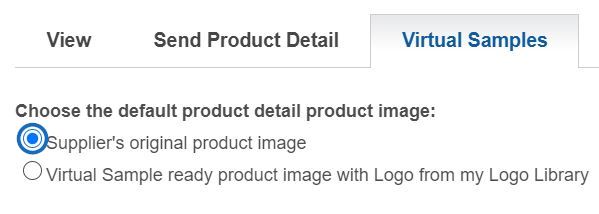
You are able to remove the virtual sample logo from all products in ESP Web by selecting the Supplier's original product image option and then clicking on the Save button at the bottom of the window.

Note: You may need to refresh your page to see these changes.
For more information on creating, editing, and applying Virtual Samples, please review the Virtual Samples in ESP Web article.


